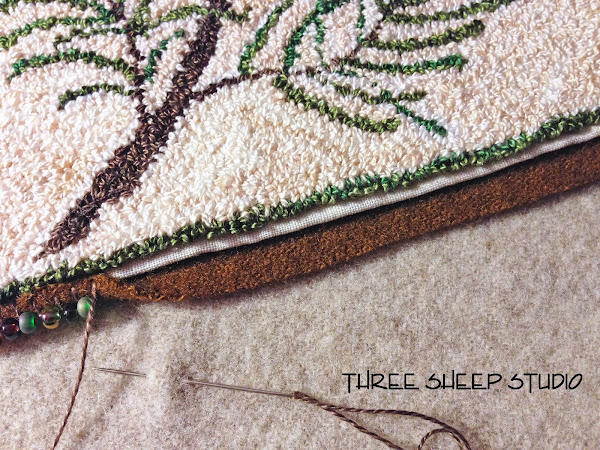
Beaded Blanket Stitch on the edge of a Punchneedle design
We are in a "crispy cold snap" here in Pennsylvania...
(It was 0 degrees this morning)
"Stay inside" weather !
The perfect time to place
the finishing touches on a few projects.
~~ To back your Punchneedle project with wool
and provide an attractive edge... ~~
and provide an attractive edge... ~~
When you fold under and secure the Weavers Cloth
to the back of your completed project,
to the back of your completed project,
allow approximately 1/4 inch (or a bit less)
of Weavers Cloth to extend
beyond your design edge.
of Weavers Cloth to extend
beyond your design edge.
Center your completed Punchneedle project
onto a piece of felted wool fabric of your choice.
(I like to spread a good fabric adhesive
on the back of the punchneedle piece,
before centering it on the wool fabric
and then press it into place.)
Tips:
**If you use fabric adhesive, allow to dry
before beginning the Beaded Blanket Stitch.**
**'Elmers Craft Bond for Fabric and Paper'
is a good adhesive for Punchneedle work.
It dries clear and remains flexible.**
Trim the wool to approximately 1/4 inch
beyond the Weavers Cloth edge.
Fold over the wool fabric edge as you
do a Beaded Blanket Stitch to secure.
I used Valdani Perle Cotton #8 for the edging,
which is the same Thread I used
in my Punchneedle design.
which is the same Thread I used
in my Punchneedle design.
I love embellishing my projects with beads...
I used Czech Glass Beads, size 6/0,
however any size bead would look beautiful.
Tip:
**Always use glass beads as plastic beads
could melt when your project is pressed.**

The 'Winter Pine' Punchneedle Pattern
can be found in my Studio.
Additional "finishes" to come...
Enjoy your weekend and 'stay warm'...
Rose


