I will often use a Beaded Picot Stitch
to edge my wool projects.
You can use one single color or
a variety of bead colors to edge your projects.
I prefer to do all my work by hand
and avoid the sewing machine 'all together'.
This way of finishing allows me to do that.
A How To / Tutorial for the
Beaded Picot Edge...
Beaded Picot Edge
How To / Tutorial
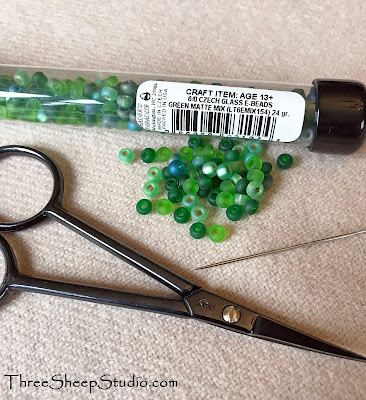
Gather your supplies:
wool fabric, sharp needle,
small scissors, thread,
glass beads
(I will be using contrasting thread, beads and wool,
so that you can clearly see the steps.)
To conceal knot -
starting between two layers of fabric,
bring thread to the underside of fabric.
Bring the needle to the front and make a single
Blanket stitch.
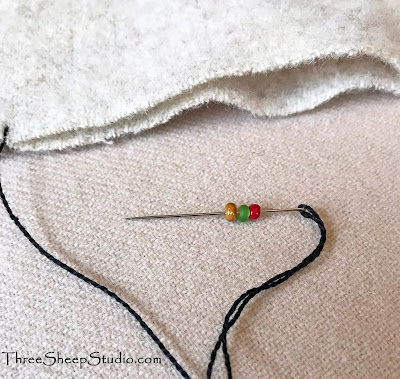
For the first 'Beaded' stitch,
place three beads on needle.
(The only time you will add three beads
to your needle is when you are starting the stitch.)
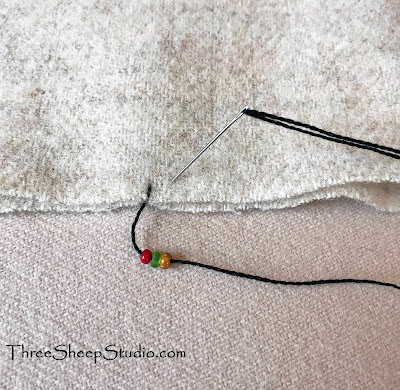
Make one Blanket stitch,
taking needle to the underside of fabric.
As you pull the thread through,
it will form a small loop. Slide your needle
through this loop, exactly as you would
for a Blanket stitch.
Pull snugly.
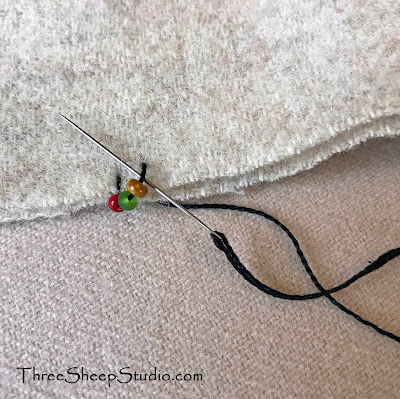
You will then slide your needle through the
third bead, in the direction from the edge of
the wool and upward.
Add two beads onto needle.
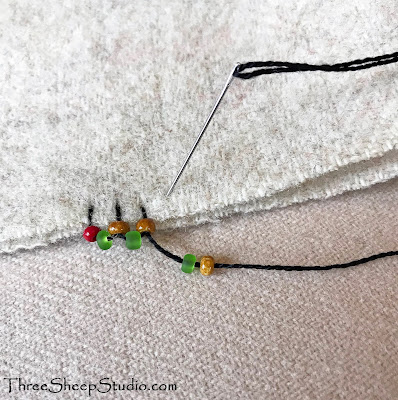
You will repeat the above process,
by making another Blanket stitch.
After making a Blanket stitch with two
beads on thread,
always remember to slide your needle
through the last bead in an upward motion,
before moving on to another Blanket stitch.
Add two more beads and
make another Blanket stitch,
taking it to underside of fabric.
As you pull the thread through,
it will form a small loop. Slide your needle
through this loop, exactly as you would
for a Blanket stitch.
You will then slide your needle through the
last bead, in an upward motion.
Continue this process.
When ready to end... take needle between
the two layers of fabric. You can then either
knot securely between fabric or
securely weave thread between
layers of fabric to end.
~ Beaded Picot Edge ~
My beads of choice for the Beaded Picot Edge
are Czech Glass Beads size 6/0
You can use any size bead
you feel comfortable with.
Always use glass beads,
as plastic beads can melt if
the fabric would need pressed.
Examples of edging...
Enjoy your day my Friends...
Rose
It's very pretty.
ReplyDeleteCathy
Thank you so much for the tutorial. I have always wondered how you did that to your pillows and other edges. Its wonderful. You know the last time I tried to use beads was before I had my cataract surgeries. I need to try it again. I just remember loosing the beads and not being able to find them. You make things look so easy.
ReplyDeleteSimply beautiful! Thank you so much for such an easy to understand tutorial.
ReplyDeleteYou are the best!
That is SO gorgeous! What a great idea, and it adds so much visual interest with such a pretty edge!
ReplyDeleteGreat tutorial and solove the beaded edges! Janice
ReplyDeleteI can't wait to try this. Thanks for the tutorial!
ReplyDeleteThank you so much for a plain, easy to understand tutorial. I can’t wait to try this.
ReplyDeletethank you for sharing - great Tutorial, nice pics.
ReplyDeleteThis is a lovely, clear tutorial! Thank you so much for the time and effort you spent to make it. I found it mentioned in Mary Corbet’s newsletter.
ReplyDeleteWhat a fantastic tutorial. I think I could actually do this. Thank you for the well thought out and clear presentation. Judy 😊
ReplyDeleteBrilliant tutorial!!! Thank you so very much for your generosity and time making and sharing it!
ReplyDeleteOh, now I have to go bead something. :~)
ReplyDeleteSo clear and beautiful thank you!
ReplyDeleteGreat tutorial, so easy to follow. I shall use it in my bead embroidery.
ReplyDeleteI love your beaded edging and can't wait to try this technique. Thank you
ReplyDeleteOh, My goodness!!! Thank you so much for this wonderful technique!
ReplyDeleteBeautiful work. Thank you so much for the tutorial. I cant wait to try it.
ReplyDeleteGreat pictures and tutorial. I'd like to use it to customise a top.
ReplyDeleteTOTALLY fantastic! I so want to do this embellishment to the dolls' clothes that I am making but this also inspires me to do cushion covers from the tartan wool fabric I have stored for years not knowing what to do with it but too lovely to discard. Thank you SO much for sharing.
ReplyDeleteThis is so lovely and looks easy with your talented tutorial. Thank you. I am ready for the next tutorial?? Please
ReplyDeleteYou have explained very clearly thank you very much
ReplyDeleteI love this work - I will have to think opposite when doing this since I am left-handed.
ReplyDeleteI love your work and am so glad to have this tutorial. I must get some beads and start practicing. Would love to do this on a wool suit jacket. Thank you so much.
ReplyDeleteIt is beautiful. I will try it out. Thanks for the easy way you have taught with the instructions
ReplyDeleteLove this beading Technic,I have a jacket that would look really great with the beading....Thank you,
ReplyDeleteThank you.
Thank you so much for this technique. Your explanation is totally clear. This gives a great stylish finish to our projects. 👏👏👏👏😃❤
ReplyDeleteThank you for being a great teacher and explaining so detailed. Hope you keep posting tutorials as this one, love
ReplyDeleteWhat a great tutorial. Thank you for sharing. I’ve been wanting to try this edging on some felted jewelry pieces.
ReplyDeleteSo nice. Thank you
ReplyDelete