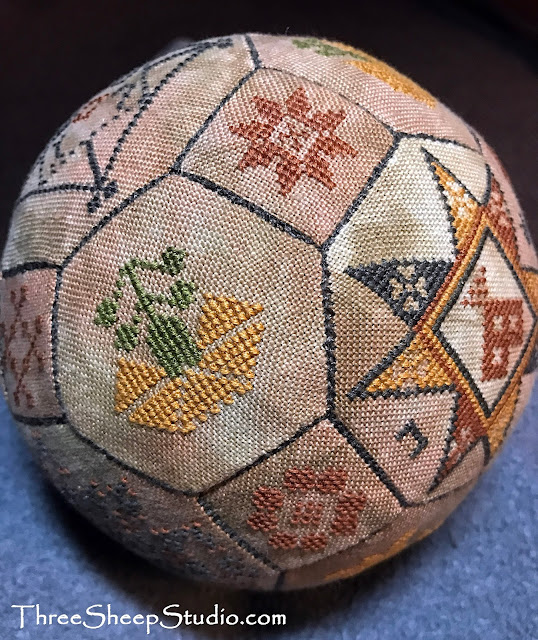
~ Quaker Ball ~
I've never made a Quaker Ball before.
So when I learned the Lehigh Valley Embroidery
Guild was doing a year long project on making one,
I was committed.
Once all 26 blocks were stitched and outlined,
we were to begin assembly in February/March.
I've never been one to sit and wait.
I'm rather a 'jump in and make it happen'
type of person.
type of person.
Surely putting together a Quaker Ball
couldn't be that hard ! Right ?
I was on a mission...
With no finishing directions...
here we go...
All the blocks had to be cut out...
now this was hard...who can 'really' cut into a
large and very expensive hand dyed piece of linen,
without second thoughts ??
whew, a sigh of relief...all done.
I needed a large, flat, hard surface
that was completely portable,
to arrange my blocks in the formation
I wanted. I used a lid from a large
plastic bin.
I remembered hearing someone say
the borders would be used to connect the pieces.
So this is where I started.
Slowly adding onto one of the main blocks.
Easy so far.
This is roughly one half of the ball...
Now I have two halves before me.
So far, it all makes sense.
But...see all those squares to the left ?
This might be where just a tad of panic set in...
where do they all fit into this plan ??
Somehow pinning and repinning,
showed me where the 'missing' pieces fit.
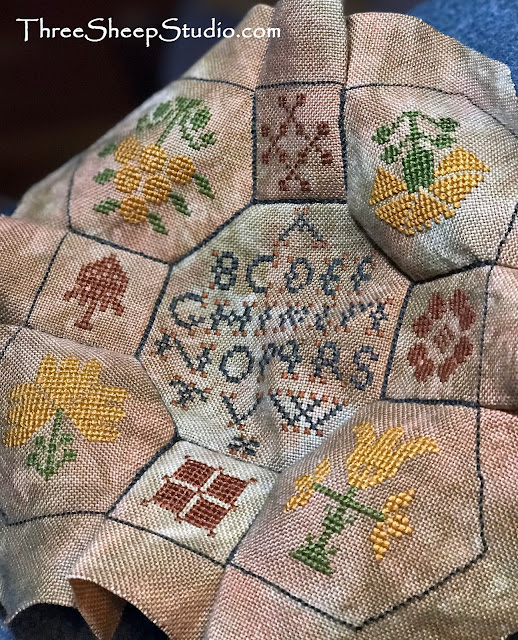
This picture is the underside of the ball
as I was stitching the pieces together.
Even as I was stitching it,
I wasn't sure until the very end,
if it was all going to fit together !
It's much larger than I expected,
and I absolutely L.O.V.E. it !
SO MAYBE...
So maybe it would have been easier for me
to wait until February and work together
as a group to finish the Quaker Ball.
So maybe it would have been less stressful
if I would have had some directions...
if I would have had some directions...
but, not nearly as fun !
~ ~ ~
And, this arrived in the mail today...
swoon...
I love seeing gorgeous wool stacked high
on my work table !
Happy Friday to you...
Rose


Amazing! That is a LOT of work and it turned out beautiful...awesome wools, too! Happy Stitching.
ReplyDeletewow! you are brave, such a work of art
ReplyDeleteHave never heard of a Quaker ball. How neat! Where will you display it?
ReplyDeleteBeautiful! What did you use for stuffing?
ReplyDeleteThat is absolutely beautiful! Wow!
ReplyDeleteWow Rose! Beautiful finish and such determination for this project, I admire you. It really is larger than I thought it would be. Now, are you going to do another one? :)
ReplyDeleteRose,
ReplyDeleteThat is simply amazing. Congrats on figuring out the assembly. I could possibly do the stitching and then it would never be completed...sigh. Simply beautiful.
How long did it take you to assemble? MANY hours I would venture to guess.
Hugs :)
Lauren
Yep....cutting into that gorgeous fabric would have been tough for me, too! But that ball is fantastic! What a prize! And stitching it together off the borders was genius! Well done!
ReplyDeleteWhat an accomplishment. Your so brave to do this. Cutting into stitching of any kind is the scariest part for me.
ReplyDeleteWhat an accomplishment. Your so brave to do this. Cutting into stitching of any kind is the scariest part for me.
ReplyDeleteThat ball is beautiful.May I ask where you purchase the beautiful wool at the end of your post?Just lovely,Dawn E. Brown
ReplyDeleteAs always this piece is stunning. The linen, your colors, and your stitching. Just beautiful.
ReplyDeleteThat is just amazing. It turned out so pretty and unique. Yep, any day will wool is a nice day.
ReplyDeleteYou are so brave to have did that on your own.
Well done!! It's really beautiful. Thanks for sharing the journey. Stunning wool too!
ReplyDeleteOH.MY.GOSH. AND IT'S PERFECTLY ROUND. How cool is this??!! As Mom always said about me, you march in where angels fear to trod. Lol. Well done!!!
ReplyDeleteOh My Goodness! What a beautiful project! And what a lot of work it was! Totally worth it though - I love it!
ReplyDeleteI love this Quaker ball. I've never heard of it before. Can you share what pattern it is? What kind of fabric? I cross stitched before, but this project will get me stitching again! Thanks!
ReplyDeleteAbsolutely awesome! You have inspired many people to give this a try soon! :-)
ReplyDeleteHi Rose! THAT is a stack of wool to swoon over! Was stopping by to see if you sold wool circle punches...but didn't see any in your shop. As always...I enjoyed swooning over all your wonderful projects!
ReplyDeleteEs la bola más bonita que he visto, me encanta!
ReplyDeleteUn saludo.
Gracias.!!
ReplyDeleteVamos a hacerla mi amiga Triniki y Conchi esta Navidad..🎅🎅